 Photo copyright: Noah Bell, Bamboo Garden Close up of large Fargesia sp. 'Rufa' Note that F. robusta, F. sp. Scabrida, and F. sp. Rufa all have similar culm sheaths and culms. We believe they are closely related. |
Fargesia sp.
'Rufa'
Maximum Height: 10' (avg. 7'), Cane Diameter: ½"aka Fargesia dracocephala 'Rufa' Hardiness: -15º F USDA zone 5 through 9, not for climates with high heat and humidity (southeastern states). A beautiful and very hardy Fargesia with new culms that have attractive rusty reddish sheaths and a clumping root system. This new introduction is proving to be one of the most hardy and versatile clumping bamboo in the landscape. It is a shorter Fargesia, only about 10 feet tall when mature, but a vigorous grower, sending up many new culms each season. The new culms leaf out early in the summer, making it an excellent choice where its rapid growth is desired. Like Fargesia dracocephala and Fargesia robusta, its leaves do not curl in the sun, but it is hardier than either of these. Yet like all Fargesias, it should be planted with protection from the hot afternoon sun, especially in warmer climates. We have customers who have grown very successful evergreen screens, using Fargesia sp. Rufa in places such as Michigan, New York, Massachusetts, New Jersey, Tennessee, Missouri, Idaho, South Carolina, and many other states. It has proved to be the most versatile, hardy clumping bamboo in our selection. Unfortunately it cannot handle the high heat and humidity of the southern gulf states. If you need a clumping hedge that gets 8 to 10 feet tall, with a beautiful, evergreen leaf texture, Rufa will not disappoint, just remember, afternoon shade is preferred. Recently suggested by Chris Stapleton to be the original "Dragon's Head Bamboo" (Fargesia dracocephala) described by Chinese botanists. also see Fargesia sp. Rufa Green Panda |
 Photo copyright: Noah Bell, 2009 ~A screen of F. sp. 'Rufa' at Bamboo Garden, about 9 feet tall |
|
 Close up showing rusty red culm sheaths. |
 Photo copyright: Ned Jaquith, Bamboo Garden A nice Fargesia sp. Rufa growing along a water canal in Holland. Click on link to see larger picture |
 Photo copyright Noah Bell, Bamboo Garden, 2012 A large order of Fargesia sp. Rufa in the # 1 size, scheduled to be shipped out on a windy spring day. |
|

  photo copyright: Noah Bell, Bamboo Garden Our one gallon crop of Fargesia rufa: 4-6 canes, 2-3 feet tall A customer admires her Fargesia rufa. It was planted from a two gallon size and has grown over five feet tall after only a year and a half. | |
dinsdag 15 augustus 2017
Fargesia Rufa Bamboo


zaterdag 15 april 2017
Cactus soil
How to make cactus soil
Read more at Gardening Know How: Cactus Potting Soil – Proper Planting Mix For Cacti Plants Indoors https://www.gardeningknowhow.com/ornamental/cacti-succulents/scgen/cactus-potting-soil.htm
mix 1:
he plants are fine with one part washed sand, one part soil and one part gritty amendment such as pebbles or even pot shards
mix 2:
five parts potting soil, two parts pumice and one part coir for a mixture that dries out evenly.
http://www.cactiguide.com/article/?article=article8.php
Introduction
Now that we've ruled out pre-made mixes as a stand alone solution for our cactus soil, lets look at one method of making a custom mix. To start with, you will want a container large enough to hold all of your ingredients with enough room to stir them together without spilling. I prefer to use plastic storage tubs (see far bottom left picture), but a wheel burrow could also work. You will also want some sort of measuring device for consistency. This does not have to be precise, I use a 5 quart plastic ice cream container. You can "eyeball" the amounts as well, but you will likely end up with inconsistent proportions from batch to batch so I don't recommend that. A trowel or small shovel will also be useful for mixing it all together.
 Good drainage is essential to prevent cactus roots from rotting, but
some organic material is good for
nutrients and keeping the mix from drying out too quickly. I use a
"standard" potting soil.
I try to avoid soils that have large chunks of "forest products", that
is bark pieces and wood chips. While most potting soils are
a combination of "forest products" and peat, some are more like mulch
than soil. These big chunks are avoided as they don't mix well with
the other components of the custom soil and eventually rot.
Good drainage is essential to prevent cactus roots from rotting, but
some organic material is good for
nutrients and keeping the mix from drying out too quickly. I use a
"standard" potting soil.
I try to avoid soils that have large chunks of "forest products", that
is bark pieces and wood chips. While most potting soils are
a combination of "forest products" and peat, some are more like mulch
than soil. These big chunks are avoided as they don't mix well with
the other components of the custom soil and eventually rot. Desert Mix
Soil:
I will include one 5 quart bucket of this (or one part, depending on the amount I'm mixing).
Pumice
Next, I will include 2 buckets (or 2 parts) of pumice.
Pumice is a relatively light weight volcanic rock that is porous. Pumice is not available in many areas and while light, it is still too heavy to mail order with shipping costs. Substitutes include pearlite, non-soluble cat litter, aquatic plant soil or Turface, NAPA oil dry #8822, chicken grit, or another similar substance. The goal is to provide an inorganic substance that allows water to pass through the mix quickly, while at the same time making the mix somewhat "airy".

Coir
The third ingredient that I use is coir. Most people have never heard of coir and it is not a product that is easy to find, even though it isn't that rare. Coir is made of shredded coconut husks and is a coarse, fibrous material that is technically organic, but it is very slow to decompose. The purpose of adding coir to the cactus mix is to help hold moisture and air while providing structure to the mix. Unlike peat, coir can easily be re-wet after it dries out and it does not compact.
If you cannot find coir, peat can be used as a substitute, but you may consider using less of it. And since many potting soils have a high percentage of peat, you might just skip adding peat altogether - perhaps 60% pummice/grit/litter to 40% potting soil.
I use 1 bucket (or 1 part) of coir in my mix. Coir is sold in very tightly compressed bales. Before using it in your mix, it has to be loosened up. This is hard work and while it can be done by hand, I found the best method to be a wire mesh screen mounted on a wooden frame. I then break chunks off the bale and rub them on the screen. When this is done, the coir expands to at least 3 times its original volume in the bale.


Mix for epiphytic cacti (epis):
I do it much the same way, but instead of 2 buckets (2 parts) of pumice, I will add only 1.
Next, I will add 2 buckets (2 parts) of coarse "orchid bark". This is ground up redwood bark pieces that are marketed for use by orchid growers. The bark holds more water than the pumice, which the epi cacti like. I notice that the roots also like to attach to the bark pieces. The bark also keeps the mix more airy than simply adding more potting soil. Over time, the bark will break down and turn into soil. I find that the epi cacti don't mind this at all, but will eventually appreciate a repotting. I would say it is best to repot every 2 to 4 years depending on your specific conditions.

Addition to desert mix and the epi mix:
I add a time-release fertilizer. The best known brand of this is Osmocote® and that is the kind I have always used, although I am sure similar products would work fine. I usually put about 3/4 of an inch in the bottom of the 5 quart ice cream pail and then dump it in.
You'll have to figure out how much that is if you are using a different measurement or just follow the recommendations on the label. Since this is a time-released fertilizer, a newly potted plant will be fine for 6 months to a year, depending on how much you water it. The epi cacti will obviously be on the short end of that. You will not likely be ready to repot at this time, so you will want to remember to apply a fertilizer after this time.
Bone meal
Aside from this fertilizer, I've also picked up the habit of throwing in a scoop (1 trowel full) of bone meal. Admittedly, I'm not really sure of the effects on the cactus by adding this, I just got the idea from another grower. His plants grow very well and it seems to be working well for me so far.


Mix it all up
Once I have all the ingredients in my tub, I mix them with the garden trowel. If it is a larger batch, I use a small spade. In the left picture below you can see the various ingredients ready to be mixed for an epi cactus mix. This gives you some idea of the proportions used - keeping in mind that there is overlap in that tub.
The second picture shows the final result of a desert cactus mix. Note the absence of any bark pieces. The little yellow dots are the fertilizer. Finally, it might seem in that mix that there is a 50:50 mix of soil to pumice, but remember 25% of the soil mix is coir. It seems to lose its reddish brown color when all mixed in.


epi cactus mix desert cactus mix
In conclusion
I reiterate that this mix is not the magic recipe that all growers should follow exactly. I even vary this mix with certain cacti species that might prefer even less organic material. Keep in mind also that there are many other factors such as, light, humidity, and temperature that affect the growth of your cactus plants. These all should be considered along with availability of materials when you set about creating your own mix. Don't be afraid to experiment as that is half the fun! It is my hope that this article will provide the reader with a "better feel" for mixing up a custom batch of cactus soil.
Author: Daiv Freeman
zaterdag 18 maart 2017
Rhipsalis mesembryanthemoides
Scientific Name
Rhipsalis mesembryanthemoides Haw.
Common Names
Clumpy Mistletoe Cactus, koraalcactus, biescactus
Scientific Classification
Description
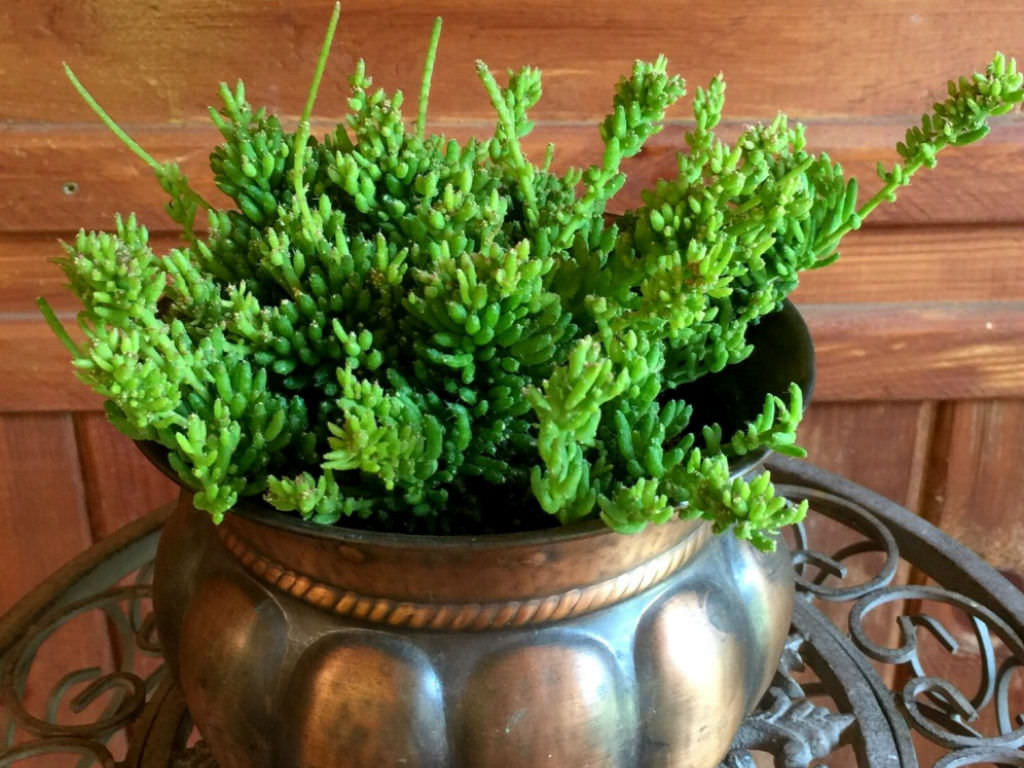
Rhipsalis mesembryanthemoides is an epiphytic cactus with strong stems covered by tiny branchlets. Initially this plant grows erect, later it is pendent. The main branches are elongated, cylindrical and woody, up to 20 inches (50 cm) long and up to 0.08 inch (2 mm) in diameter. The white flowers appear at areoles of the branchlets. They are up to 0.3 inch (8 mm) long and up to 0.6 inch (5 mm) in diameter. The short-oblong fruits are white, up to 0.2 inch (5 mm) long.
How to Grow and Care
Rhipsalis does not thrive in direct sunlight. Exposure to afternoon sun can burn the leaves, turn them yellow, or lead to spotting. However, without sufficient sunlight, They will not bloom, and its growth can be stunted. Rhipsalis does best with morning sun and full shade in the afternoon.
As Rhipsalis is commonly grown indoors, care must be given to the placement of the plants. They should be kept at least 20 inches (50 cm) away from windows that receive midday or afternoon sun. The glass in the windows can multiply the heat from the sun’s rays, causing sunburned leaves. Keep in mind that in its native environment, Rhipsalis is accustomed to receiving light that has been filtered through dense, overhanging tree branches. Picturing this environment can help you adjust your lighting accordingly… – See more at: How to Grow and Care for Rhipsalis.
Origin
It is widespread in the Brazilian state of Rio de Janeiro, on both sides of the Baja de Guanabara, at an altitude below 600 metres (2,000 ft) above sea level.

How to Grow and Care for Rhipsalis 0
By WoS on January 18, 2016
Cultivation, General Care
Rhipsalis is a cacti genus with approximately 35 distinct species. One of the most popular varieties is Rhipsalis baccifera, also known as Mistletoe Cactus. This should not be confused with the plant commonly called Christmas Cactus; although they are cousins, they are very different plants and are not classified in the same genus. While many people think of the prickly plants that are native to the American deserts when they hear the name “cactus“, most Rhipsalis have no needles, and they would not survive the dry soil and bright sun of a desert. Virtually all species are native to the rainforests of South America, the Caribbean, and Central America, leading to their classification as jungle cacti. The difference between the native environments of jungle and desert cacti means that caring for Rhipsalis requires overcoming any pre-conceived notions you might have about what cacti prefer.
Lighting Requirements
Rhipsalis does not thrive in direct sunlight. Exposure to afternoon sun can burn the leaves, turn them yellow, or lead to spotting. However, without sufficient sunlight, They will not bloom, and its growth can be stunted. Rhipsalis does best with morning sun and full shade in the afternoon. As Rhipsalis is commonly grown indoors, care must be given to the placement of the plants. They should be kept at least 20 inches (50 cm) away from windows that receive midday or afternoon sun. The glass in the windows can multiply the heat from the sun’s rays, causing sunburned leaves. Keep in mind that in its native environment, Rhipsalis is accustomed to receiving light that has been filtered through dense, overhanging tree branches. Picturing this environment can help you adjust your lighting accordingly. Rhipsalis Photo via archiwum.allegro.pl
Watering
Rhipsalis is not a drought-resistant plant, so regular watering is essential. Over-watering, however, can cause weak stems and rotted roots. Using a watering can may help you measure the amount of water you are providing. The size of the pot compared to the size of the plant, the humidity levels in the home, and the type of potting soil used can all affect the watering frequency. Rhipsalis seldom needs to be watered more than once a week. Check before watering by pressing your finger into the soil to a depth of half an inch. Postpone watering if the soil is moist. You can also use a moisture meter to help you determine whether it is time to water.
Selecting Pots
Rhipsalis does best when planted in clay pots. The advantage of clay pots is that they allow the soil to “breathe” better than other types, helping to dissipate moisture that could rot the plant’s roots. Most varieties of They produce long, hanging leaves that make them ideal hanging plants, so when selecting pots, many people choose styles that can be placed in a metal or macramé plant hanger. Soil Novices to the world of jungle cacti might prefer purchasing a potting soil made specifically for cacti. Gardeners with experience growing succulents can make their own by combining regular potting soil with sphagnum, coir, orchid bark, or gravel to ensure proper drainage. Most types of Rhipsalis will need to be transplanted every two or three years using fresh potting soil. When repotting, take care not to damage the roots.
Fertilizing
Do not feed newly repotted or just-purchased Rhipsalis for 12 months. Rhipsalis does not need feeding until the soil begins to become depleted of nutrients. If feeding is desired, use a diluted, half-strength fertilizer formulated for cacti. Feed monthly only during spring and summer months. Follow the directions provided with the fertilizer to determine the correct quantity, which will be based on plant size, pot size, and other factors.
zaterdag 10 december 2016
landscapes in jars
source: http://www.christofferrelander.com/projects/jarred-displaced/
CHRISTOFFER RELANDER
CONTEMPORARY PHOTOGRAPHEr


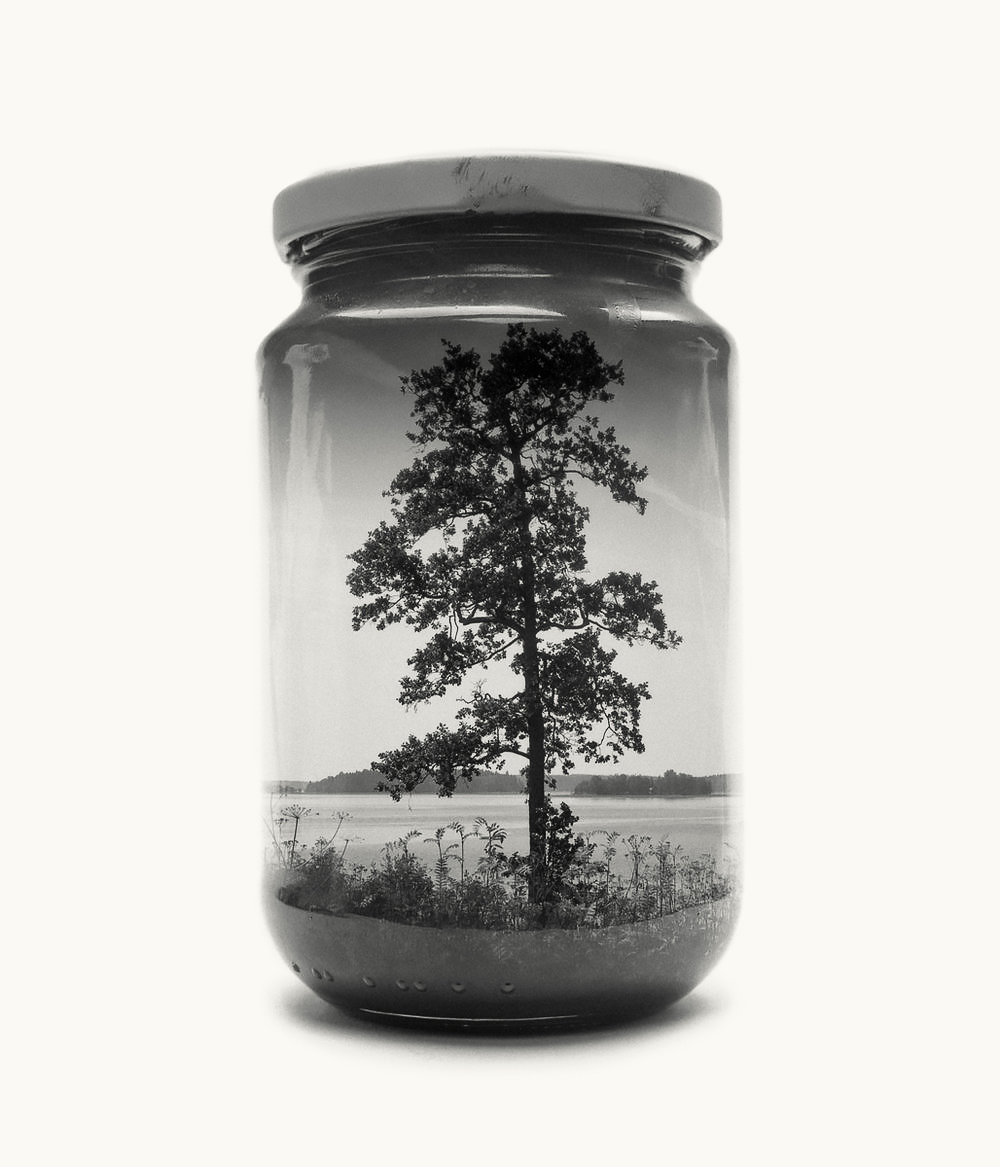


Limited edition prints are available on request.
zondag 4 december 2016
Gatenplant (Monstera Deliciosa): stekken en verzorgen
De gatenplant (Monstera Deliciosa): stekken en verzorgen
source: http://dier-en-natuur.infonu.nl/bloemen-en-planten/142821-de-gatenplant-monstera-deliciosa-stekken-en-verzorgen.html

Als je een oerwoud wilt aanleggen in de woonkamer dan is de gatenplant of Monstera Deliciosa, zoals de Latijnse naam luidt, de perfecte plant. Deze plant is oersterk, kan zeer groot worden en heeft zeer grote bladeren. Echter de plant verhuizen wordt, gezien het formaat, op den duur lastig. Stekken kan dan uitkomst bieden.
Was de gatenplant bij aankoop in de winkel nog een fraaie kleine plant van een halve meter, zes jaar later groeien bladeren van maar liefst tachtig centimeter doorsnee tegen het plafond en staat er een grote zware plantenbak op de vloer. De twee-zitsbank en andere meubels hebben plaats moeten maken voor deze reus. Dit is, kort samengevat, de Monstera Deliciosa. Deze plant, met haar kenmerkende gelobde bladeren, geeft iedere woonkamer iets extra’s. Hou je van een oerwoud in de woonkamer, dan is deze plant zeer geschikt.
De plant in haar natuurlijke habitat
De gatenplant komt van oorsprong uit West-Indië en Zuid- en Midden-Amerika, en heeft haar naam te danken aan de vele gaten en inkepingen in de bladeren. De Monstera Deliciosa is een echte klimmer, ze is in haar natuurlijke habitat gewend om hoge oerwoudreuzen te beklimmen. Met de kenmerkende luchtwortels worden zowel vocht en voedingsstoffen opgenomen van de boomstam, als uit de lucht. Daarnaast dienen deze luchtwortels als steun. In het oerwoud is het overal vrij donker, dat is de reden waarom de gatenplant gewend is om goed te groeien in schaduwrijke plekken. De plant kan goed tegen droogte, maar geeft de voorkeur aan veel water. De bladeren, die in het begin nog klein en niet gelobd zijn, kunnen wel een meter in doorsnee worden.Als kamerplant
Als kamerplant moet de gatenplant vaak worden opgebonden, dit kan met behulp van een bamboestok of mosstok worden gedaan. Binnenskamers kan de plant wel drie tot vijf meter hoog worden, dus op den duur zijn veel stokken en touw nodig. De Monstera Deliciosa houdt niet van direct zonlicht, maar in de winter kan teveel zon geen kwaad. Zowel een normale als een hoge kamertemperatuur zijn zeer geschikt, echter bij hogere temperaturen moet als gevolg van snelle verdamping veel water worden gegeven. Ieder voorjaar kan de plant verpot worden naar een grotere bak, dit is ook de periode dat weer nieuwe bladeren worden gevormd. Wees niet bang wanneer de plant een tijd niet goed verzorgd kan worden, de gatenplant is het gewend om te overleven in moeilijke omstandigheden.Groeisnelheid
De plant, die vele jaren oud kan worden, groeit met twee tot drie bladeren per jaar. In het begin, als de plant nog klein is, lijkt de groeisnelheid tegen te vallen. Maar als eenmaal grote bladeren van vijftig centimeter of meer worden gevormd kan snel een enorme hoogte worden bereikt. Overigens neemt de groeisnelheid sterk af bij zeer lage temperaturen van tien graden of minder. De luchtwortels groeien eveneens snel, het kan geen kwaad om ze in te korten of helemaal te verwijderen, maar het geeft de plant veel karakter wanneer de luchtwortels onberoerd blijven. De plant is een echte stofvanger, het is aan te raden om de bladeren af en toe met water schoon te sproeien.
Vruchten en bloemen
Bloemen en vruchten ontstaan zeer zelden. De bloem is wit van kleur, kelk- of ovaalvormig en omvat een bloeikolf.Stekken en vermeerderen
Stekken gaat prima, dit mislukt eigenlijk nooit. Elk gedeelte van de stengel met een plek waar een luchtwortel uit groeit kan gebruikt worden. Topstekken met twee bladeren doen het altijd goed, maar ook met niet-topstekken kan een poging gewaagd worden. Zet de stek in een glas of bak met water en met een tot twee weken zullen uit de stengel de eerste echte wortels tevoorschijn komen.Verhuizen
Tijdens verhuizingen wordt deze plant vaak roemloos afgedankt. Het loont de moeite om de plant tóch mee te verhuizen. Het is even flink wat werk, en het kost wat helpende handen, maar als de plant eenmaal in de nieuwe woning is neergezet, ontstaat er toch een zekere mate van tevredenheid. Overigens kan, als de plant echt te groot is, altijd een topstek worden afgeknipt en deze in de nieuwe woning worden gestekt.Ziektes en plagen
Hoewel de plant erg sterk is kunnen er toch ziektes optreden, waaronder spintmijt. De plant heeft dan spinsel aan de onderzijde van de bladeren. Een andere kwaal zijn vergeelde bladeren, dit kan duiden op te veel gegeven water. In direct zonlicht kunnen de bladeren vooral in de zomer verschroeien. De plant kan daardoor in zijn geheel verzwakt raken en een heel jaar geen bladeren meer vormen. Oppassen dus met teveel direct zonlicht.Monstera Deliciosa - Gatenplant
Monstera Deliciosa - Gatenplant
|
Afkomst - De Monstera komt van oorsprong uit de tropische regenwouden van Midden- en Zuid-Amerika.
In die omgeving is het een half klimmende plant van enkele meters hoog met blad dat een doorsnede van 1 meter kan bereiken.
De vlezige luchtwortels zetten zich vast aan boomstammen, rotsen of gewoon in de grond. |
||
|
Verzorging - De Monstera Deliciosa is een sterke plant die niet
veel verzorging nodig heeft. Regelmatig watergeven en 1 maal per 2 weken
plantenmest toedienen is voldoende voor jarenlang plezier. De plant kan
zowel op een donkere als een lichte plaats staan.
Hoe meer licht hoe sneller de plant groeit. Direct zonlicht is niet goed
voor de plant. De bladeren af en toe nat afnemen of afspuiten met lauw
water.
De lange luchtwortels mag u afknippen of terugleiden in de potgrond
waarna ze als grondwortel verder groeien. |
||

|
Bloei - Soms ontwikkelt de plant een zuiver witte bloem die naar ananas ruikt en waaraan paarse besjes ontstaan. |
|
|
Vermeerderen - U kunt de plant vermeerderen door een stuk steel met blad af te snijden, liefst met een luchtwortel, en deze in vochtige, luchtige potgrond te plaatsen. Vermeerderen kan ook door middel van zaad. |
||
| Verse Lucht - Monstera is een plant die meehelpt de lucht in uw woning of kantoor te zuiveren door CO2 op te nemen en zuurstof af te geven. |

|
|
Monstera als kuipplant - Naast het gebruik van de Monstera als potplant kan hij ook in de periode mei tot september als kuipplant buiten in de tuin ,serre of tuinkamer geplaatst worden. Wel dient de Monstera geplaatst te worden op een windvrije en schaduwrijke plek. Na de zomerperiode kunt u de Monstera dan weer als kamerplant binnen plaatsen  |
||
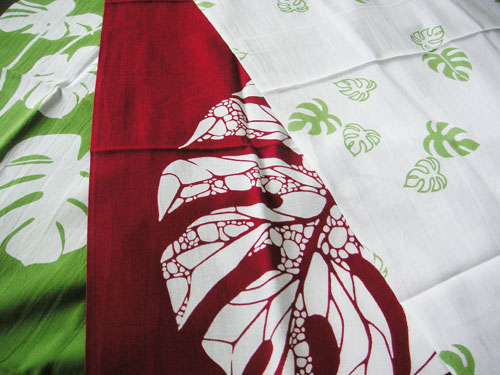
Monstera in kunst en design - De vorm van het Monsterablad is ook in de wereld van kunst en design een bron van inspiratie. In het bijzonder in landen in en rond de Stille Oceaan zijn daar voorbeelden van te vinden. Hieronder enkele voorbeelden: Japan - In Japan is ontwerper Tetsuro oh!no geinspireerd door de Monsteravorm en hij probeert deze middels enkel succesvolle websites in japan te promoten. Nieuwsgierig ? Bekijk dan zijn website: www.monstera.jp Tetsuro oh!no ontwerpt posters en illustraties met Monstera erin verwerkt. 


Ook combineert hij de Monstera met mid-century modern ontwerpen op gebied van meubelen en interieur. 


 Op gebied van textiel ziet u hier de Tenugui (Japanse handdoek) en Monstera kussens 

Singapore - In Singapore is er zelfs een 5 cent-munt met daarop de afbeelding van een Monstera. 
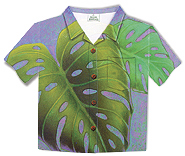
Hawai - Op Hawai Aloha-shirts wordt ook veelvuldig gebruik gemaakt van het Monstera motief. 



| ||
Monstera
Monstera
From Wikipedia, the free encyclopedia
| Monstera | |
|---|---|
 |
|
| Monstera deliciosa | |
| Scientific classification | |
| Kingdom: | Plantae |
| (unranked): | Angiosperms |
| (unranked): | Monocots |
| Order: | Alismatales |
| Family: | Araceae |
| Subfamily: | Monsteroideae |
| Tribe: | Monstereae |
| Genus: | Monstera Adans.[1] |
| Synonyms[2] | |
|
|
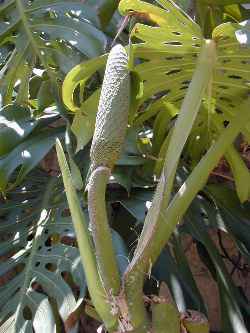
They are herbs or evergreen vines, growing to heights of 20 metres (66 ft) in trees, climbing by means of aerial roots which act as hooks over branches; these roots will also grow into the soil to help support the plant. The leaves are alternate, leathery, dark green, very large, from 25–90 centimetres (9.8–35.4 in) long (up to 130 centimetres (51 in) long in M. dubia) and 15–75 centimetres (5.9–29.5 in) broad, often with holes in the leaf blade. The flowers are borne on a specialised inflorescence called a spadix, 5–45 centimetres (2.0–17.7 in) long; the fruit is a cluster of white berries, edible in some species.
They are commonly grown indoors as houseplants. The best-known representative of the genus, Monstera deliciosa, is also cultivated for its edible fruit which tastes like a combination of banana and pineapple.
The variety in the picture is a trailer, which has heart shaped perforated leaves; the climber type has rectangular shaped perforated leaves.
Abonneren op:
Posts (Atom)